10 Tips For Better Golf Course Photography (From Your Phone!)
Thanks to the advancement of technology (and the all mighty iPhone capabilities), you no longer need a super fancy schmancy camera to start capturing better golf course photography for you club!
1) Early morning & late afternoon = GOLD
Finding the right lighting is key to capturing a great image. It’s no secret that golf courses photograph best during the “golden hour”, which is sunrise and sunset. The lower light from the sun rising or setting minimizes the issue of glare. You can also try shooting on cloudy days as this will also eliminate a lot of issues beginners have with shooting under natural light.

2) Start Shooting The Golf Course Wide
The best images for the web and social are shot horizontally, not vertically. So make sure you are shooting in landscape mode to capture wide angles. This will also help ensure that your photo is proportional and balanced, as wide angle shots tend to offer the best view of landscapes.

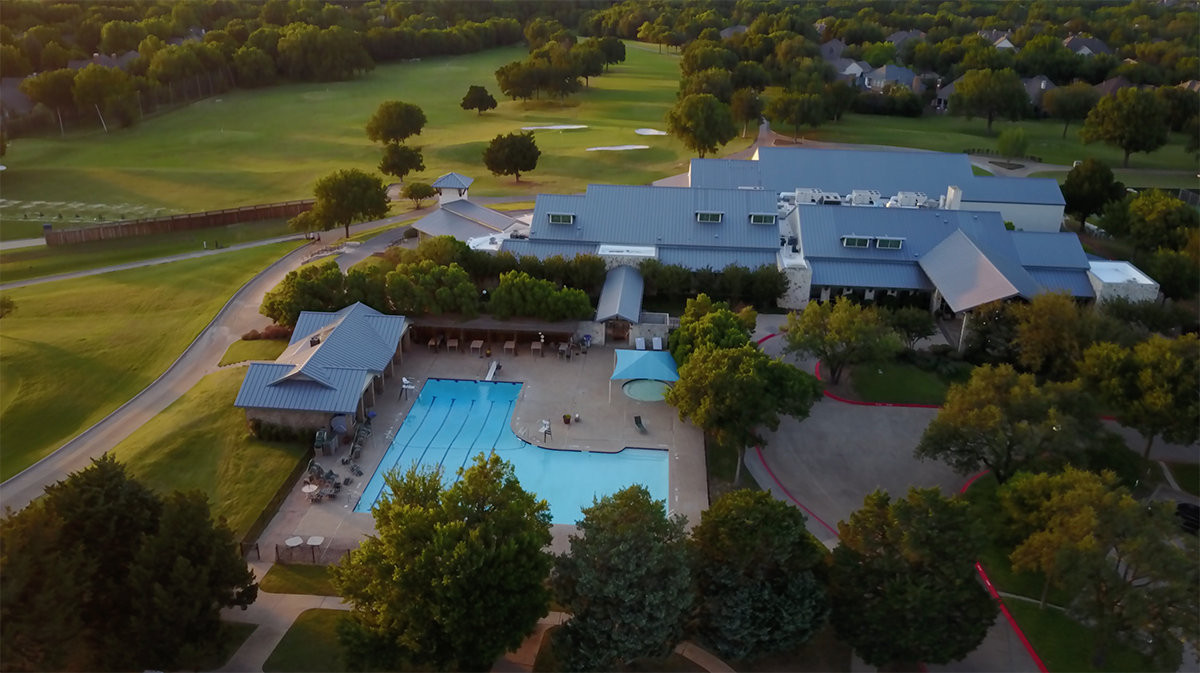
3) Golf Course Drone Photography/Video
Capturing images from above is a great way to showcase your clubs property. If you feel like getting really creative, you can shoot hole by hole flyovers that can be placed on the course section of your website to give potential members a good sense of the course layout. Drones also offer the rare opportunity for you to capture multiple aspects of your club at the same time. For example a drone photo of both your pool area and driving range would showcase your clubs versatility.
4) Include Your Members
Without members, your club would cease to exist!
One great idea is to capture images of your club’s members doing what they do best… enjoying the amenities of the club! Photos like this make your club more accessible to club goers and is a great way to showcase your club’s social calendar.
Some ideas include:
- Golfers getting ready for a club tournament
- Members socializing in the dining/ bar area
- Kids club area (important to millennials)
- Members enjoying the pool area

5) Take Videos on the Golf Course
If a picture is worth a thousand words, then is a video worth a million?
Videos are a great way to showcase what an image cant. A lot of clubs we work with lack videos for a variety of reasons but what we see most often is they are unsure of how to capture quality video.
Our biggest piece of advice to clubs we work with in regards to capturing quality video from a mobile phone is to shoot video horizontally (hold the phone sideways) and do you best to stabilize to reduce shake!
If you follow what social platforms are doing… then you understand that everything is moving towards video so now is the time to start building up your clubs video vault!
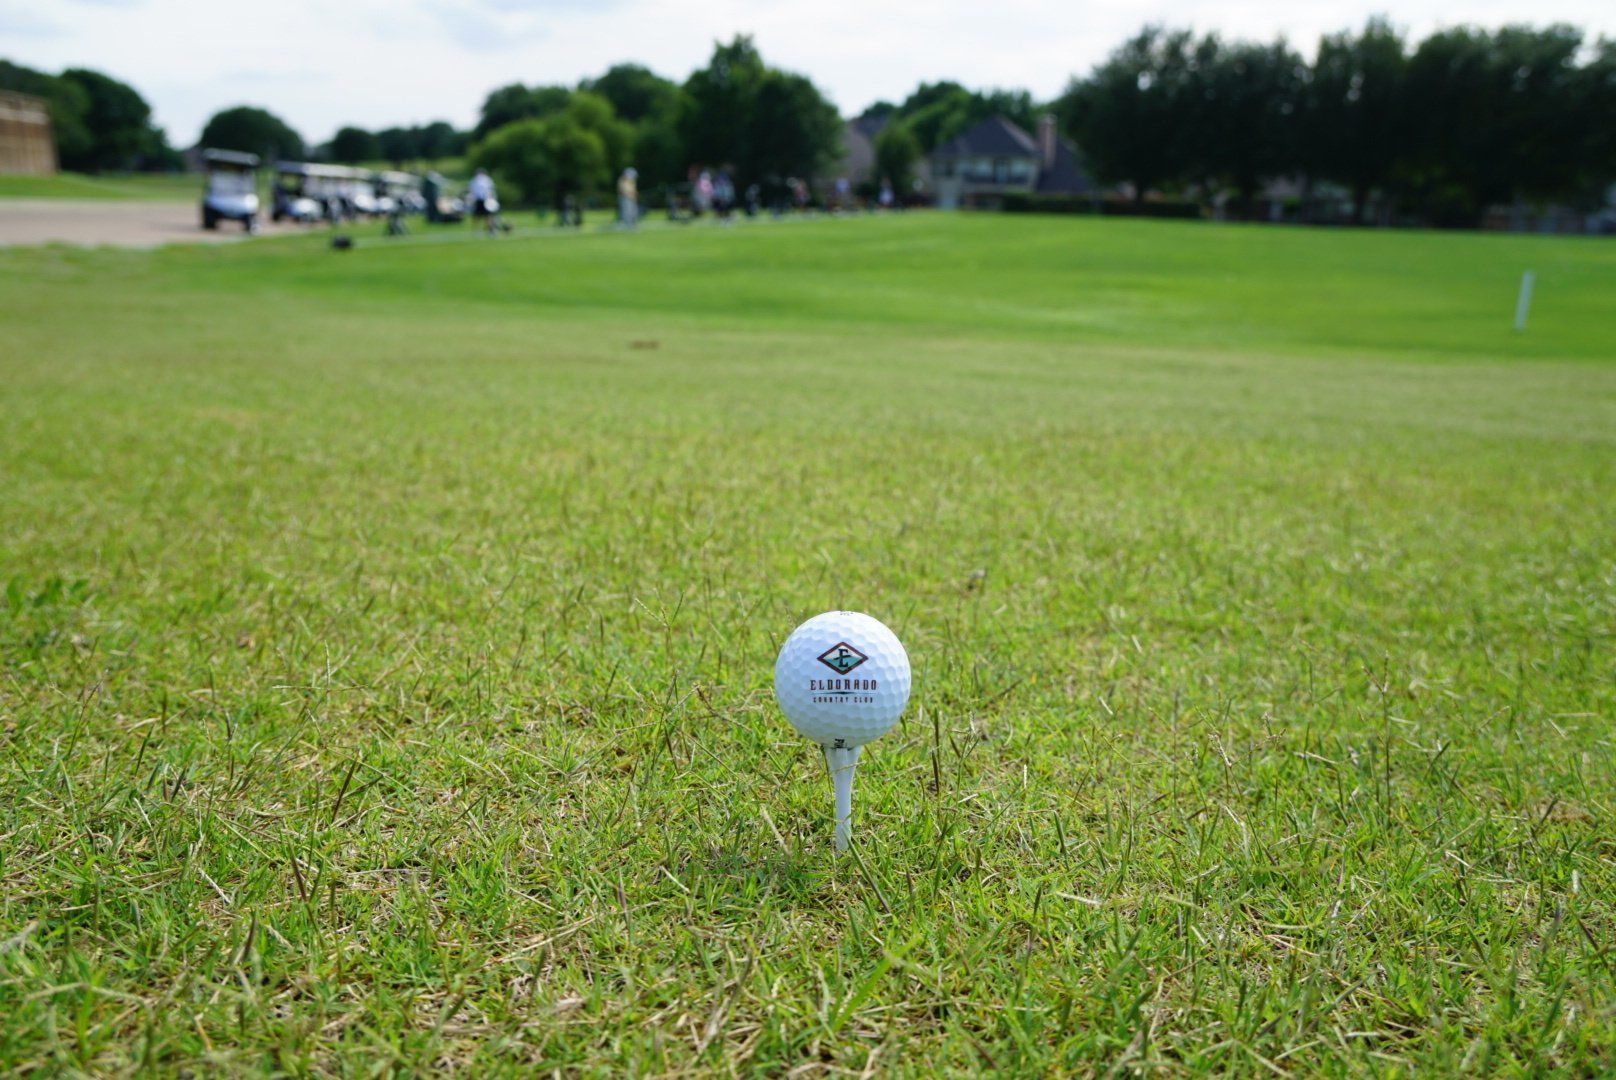
6) Use the Golf Courses Branded Merchandise!
Using a golf ball with your club logo, or a staff member wearing a shirt with your club logo not only showcases your pro shop but also proves your club as an established club. Using your club logo in your shots also ensures that your photo can not be used by another club and assures the the photo they’re looking at is actually from your club.

7) It Matters Where Your Golf Course Photos are Taken!
Photography is all about setting up the ideal perspective. Getting a shot from a higher vantage point allows you the get more in your photo. Conversely, you can take a shot of something close to the ground to focus in on an object or feature, for example shooting pictures of the green from the sand trap allows you to put the green in perspective of the hole.
8) Use a Stabilizer
If you are shooting video, you don’t want your end product to look like you recorded during an earthquake. Instead, use a stabilizer to have clean, shake-free video. Stabilizers like tripods are available online. However, there are also smaller hand-held devices, like a gimbal, that can stabilize your camera while you are walking. Stabilizers are also great for taking photos, especially if you have shaky hands.
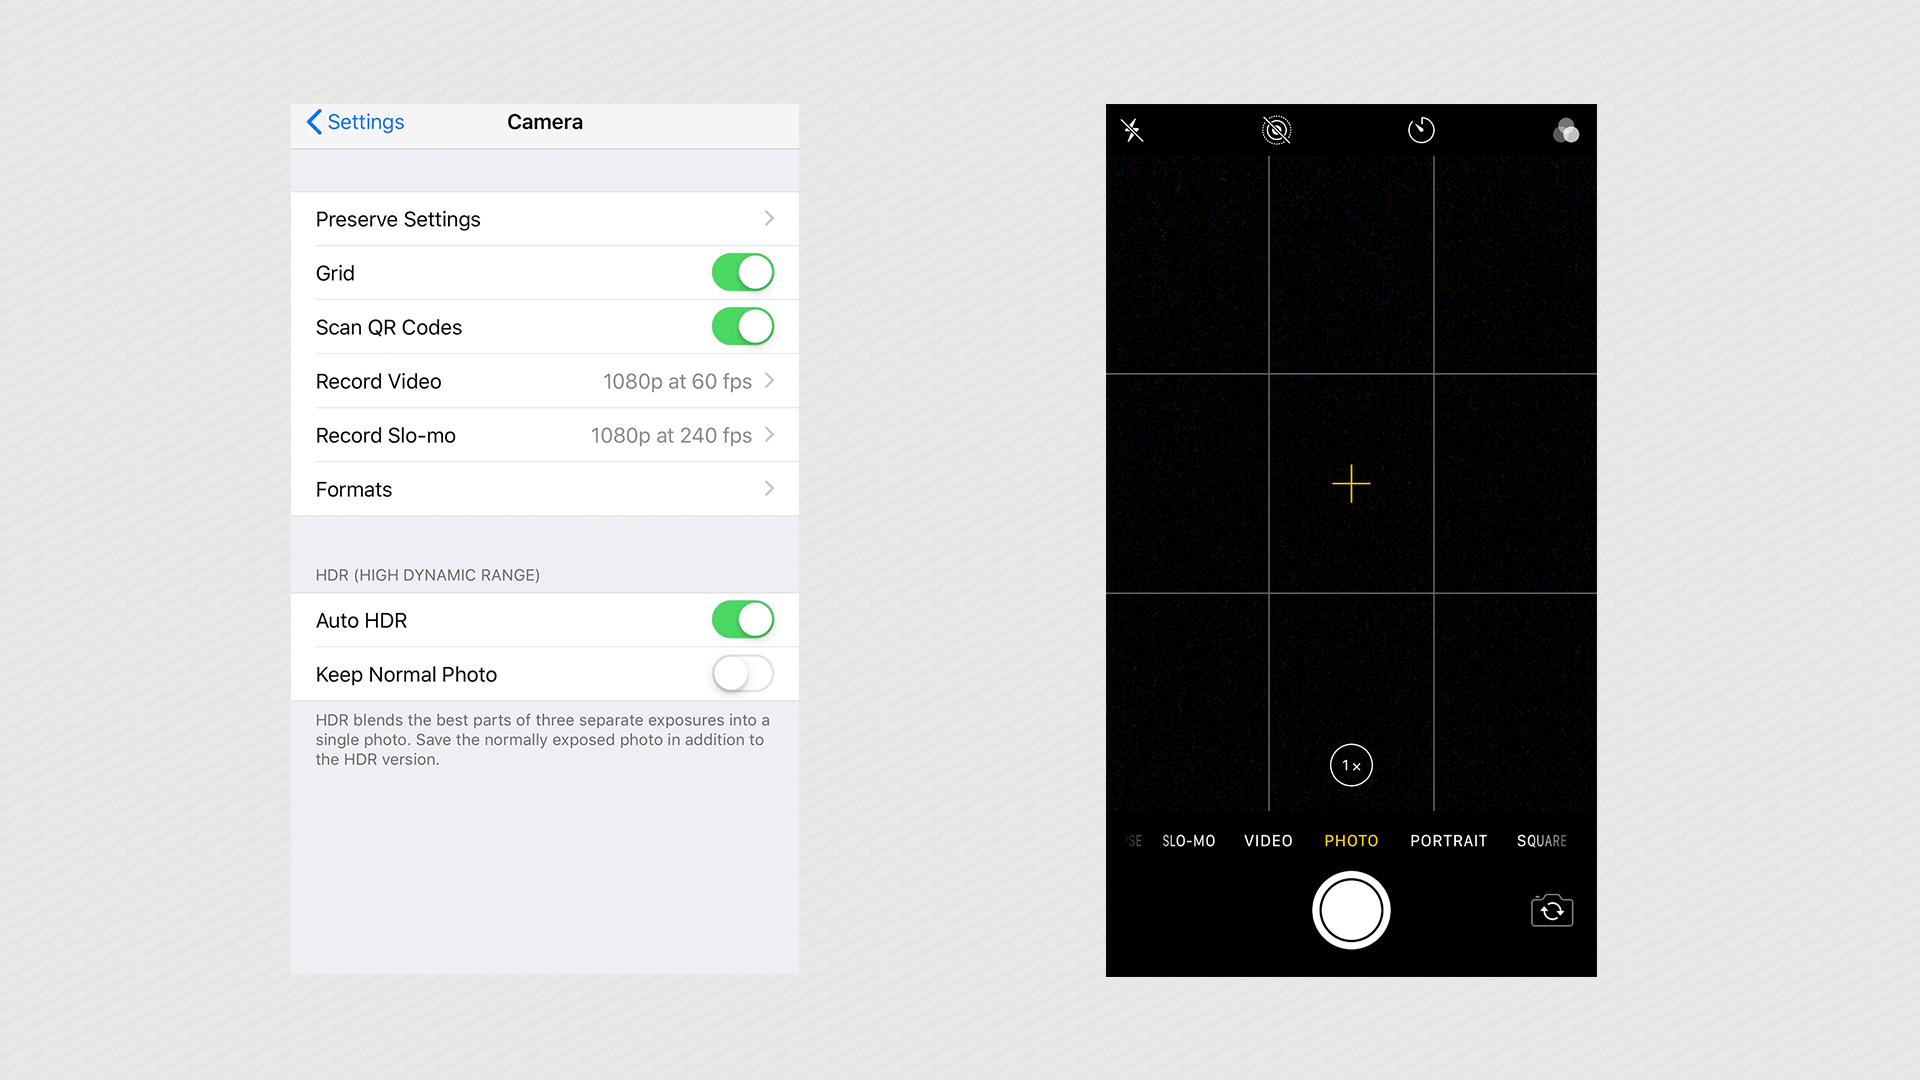
9) Remember the Rule of Thirds
The rule of thirds is the most well-known photography rule on the books. When taking a photo, imagine breaking down your image into thirds both horizontally and vertically. This will leave you with nine parts or boxes. The rule of thirds states if your subject of the photo on the intersection of these lines, you will have a better composition. The rule of thirds can be a hard concept to grasp if you do not have the lines in front of you. Simply put, the rule of thirds puts the subject of the image slightly off center of the frame, giving the image a more balanced look. Most camera phones have the option of adding a grid to your screen while taking pictures to give yourself a guideline to go by. IOS offers these feature settings under Camera.
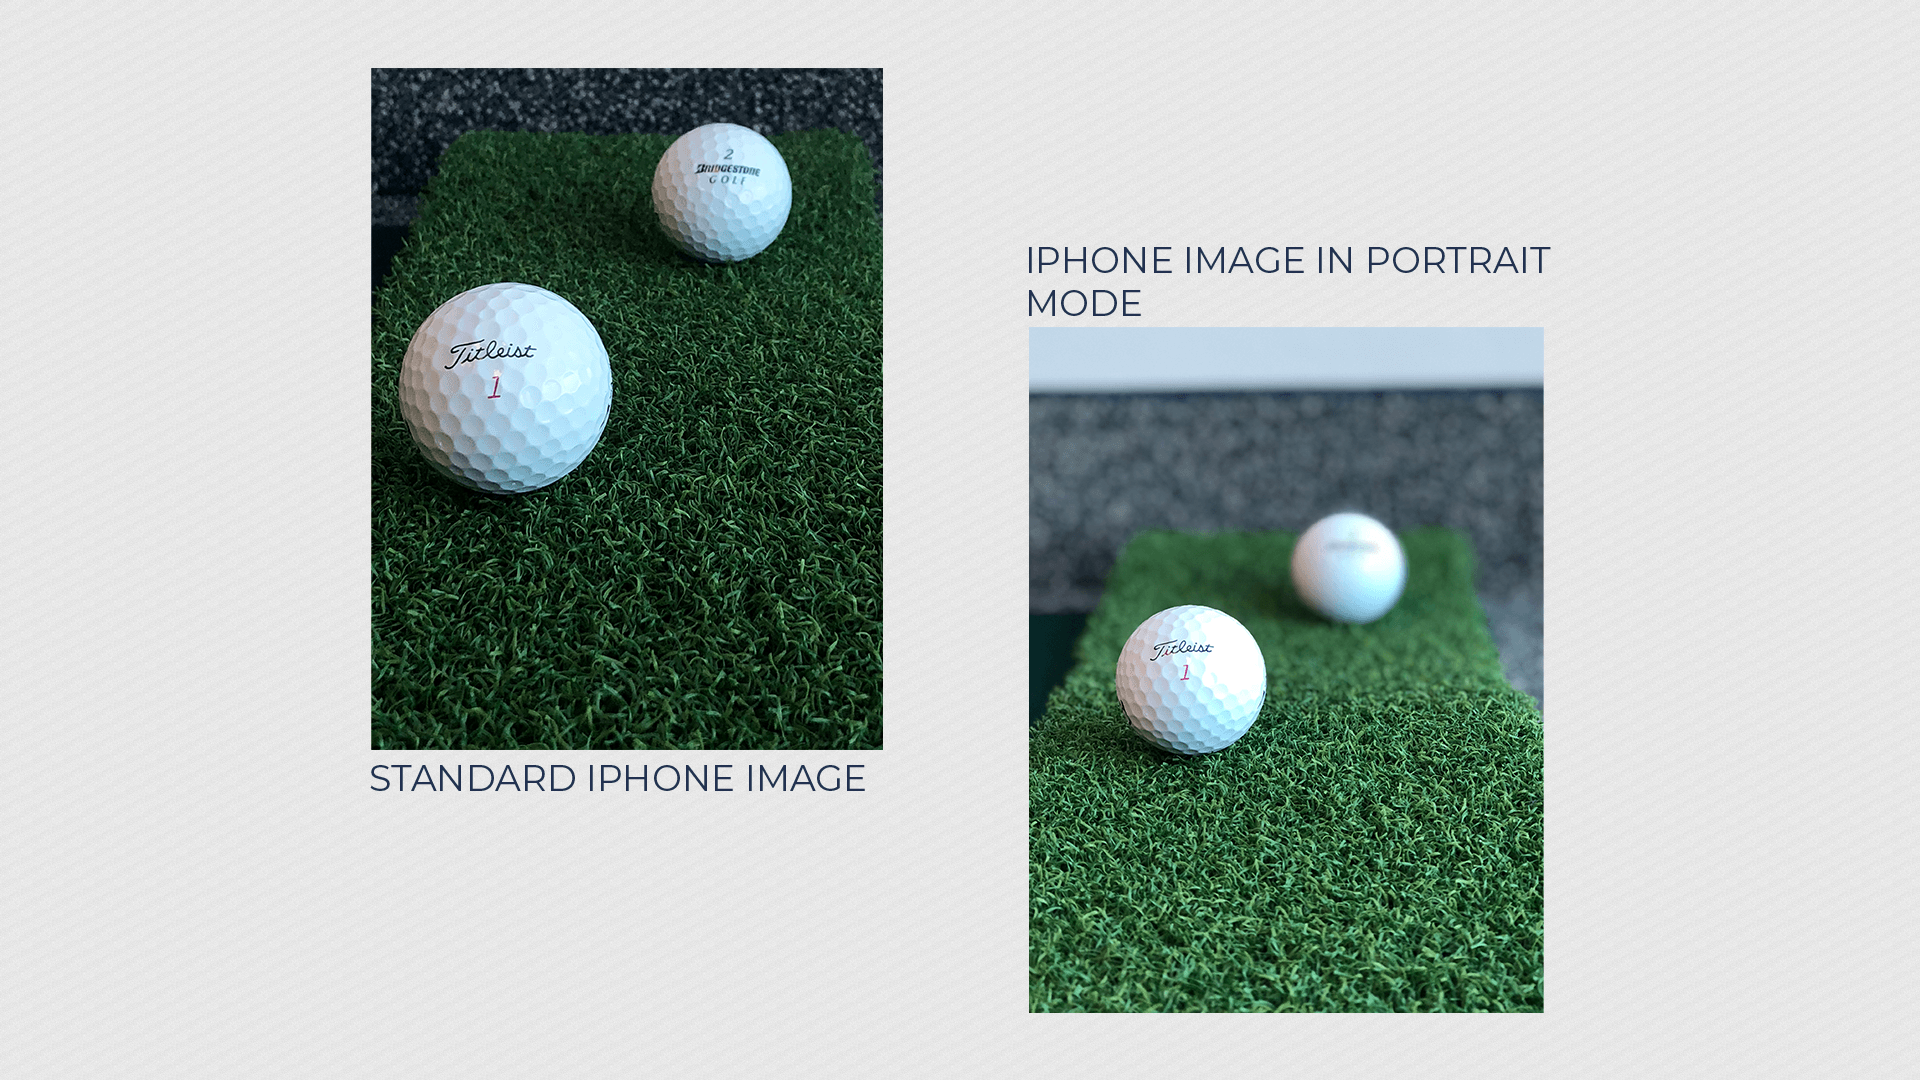
10) Use your phone’s portrait mode
This last tip is limited to those who have smartphones with a dual lens camera system. Even though you might not have one of these phones in your hand right now, with their growing popularity there’s a pretty good chance someone you know might have one that you can borrow to snap a few shots. A dual lens system brings in an element of photography that previously was not as accessible unless you had a professional camera set up. The first advantage of using these smartphones is the introduction of optical zoom, giving you the ability to zoom in on a subject that might be a little further away all while retaining image quality. However, the biggest advantage a dual lens system brings you is the ability to manipulate depth of field. The smartphone’s software coupled with the use of both camera lenses gives your images a shallower depth of field, giving you the ability to blur backgrounds and better isolate your subject from the rest of the image. An extremely easy to use tool that is great to use when promoting your clubs brand with new product pictures, promotions, or if you’re just looking to get your brand out there. The example below is pretty simple but it shows you how a basic change can draw the eye to a specific spot in the image.